
 https://clramirez.com/media/x17-create-new-vm-install-centos-7.jpg.pagespeed.ic_.yzW5oSuw2v.jpg
 DVD ISO | Everything ISO | Minimal ISO
![]()
We are using CentOS 7 because of 2 reasons:
Close relation/similarity to Red Hat Enterprise Linux (RHEL)
Employers seek experience with RHEL
There are a couple of steps we will need to take after downloading our .ISO image (picture listed below the steps listed):
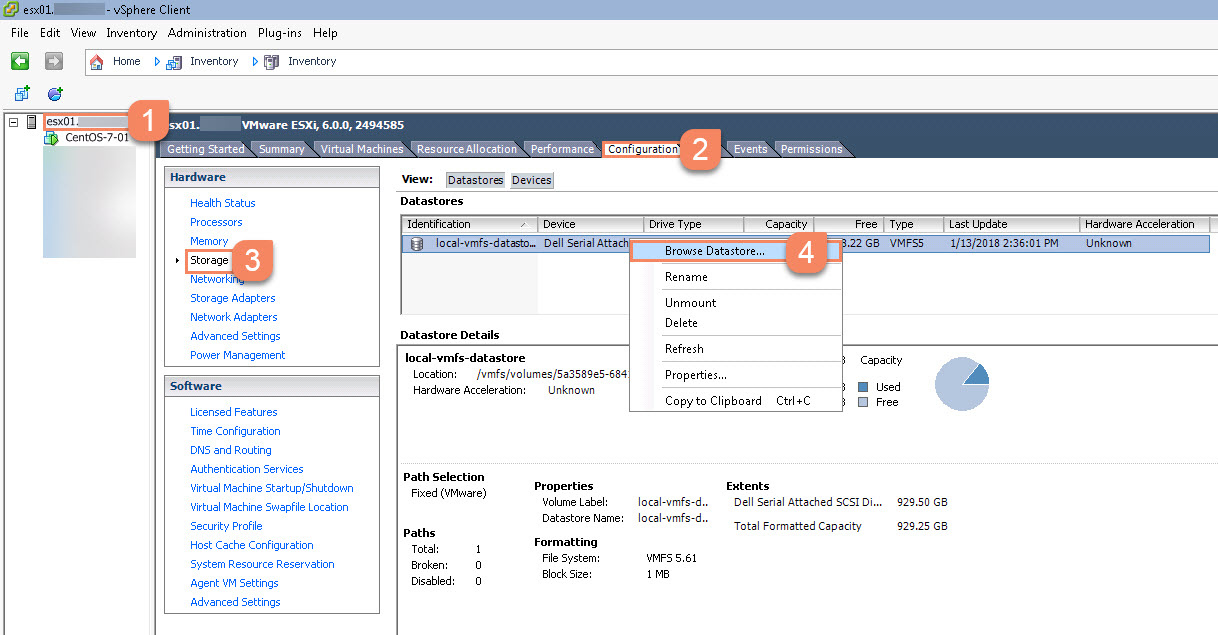
Navigate to ESXi Host in ESXi
Click on the CONFIGURATION tab
Select STORAGE from the Hardware section
Right Click Datastore and select BROWSE DATASTORE
Don’t have an _ISO-IMAGES folder be sure to create one
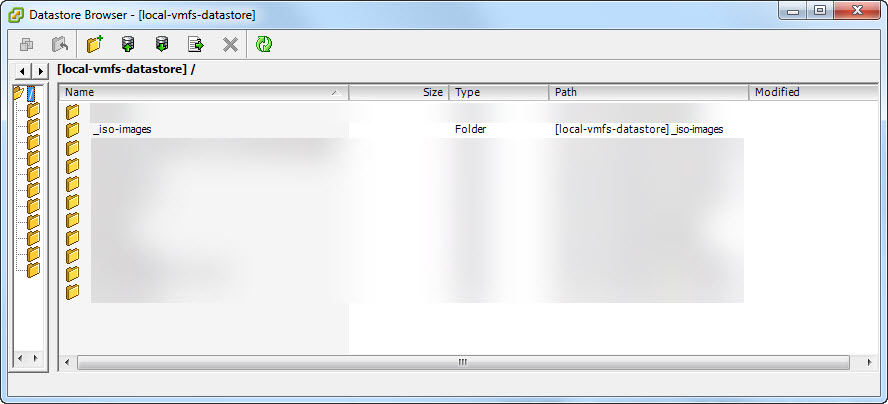
Select or Create _ISO-IMAGES folder
UPLOAD your .ISO with button that has been highlighted
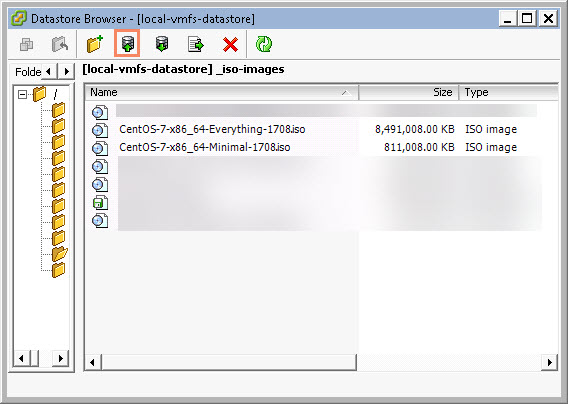
Click the UPLOAD button to UPLOAD your .ISO image
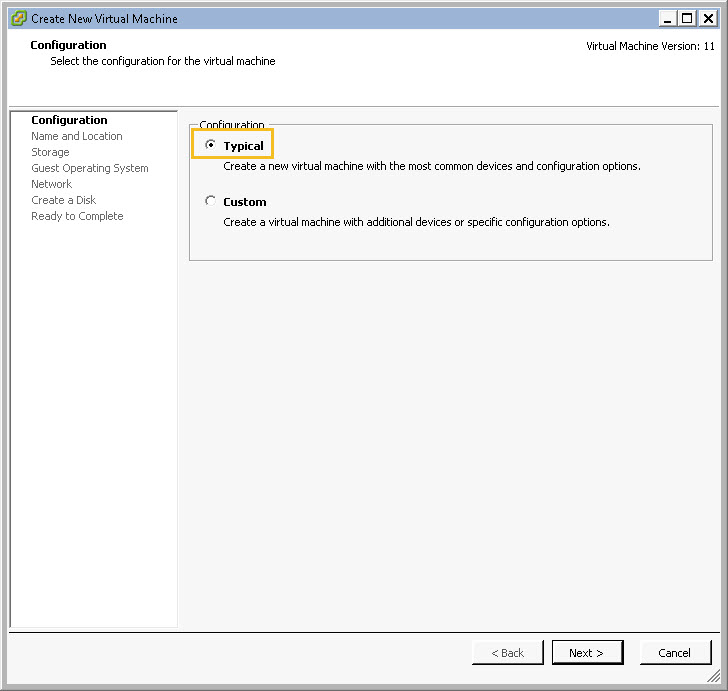
Select Typical, and then click Next
Create a NAME for your new VM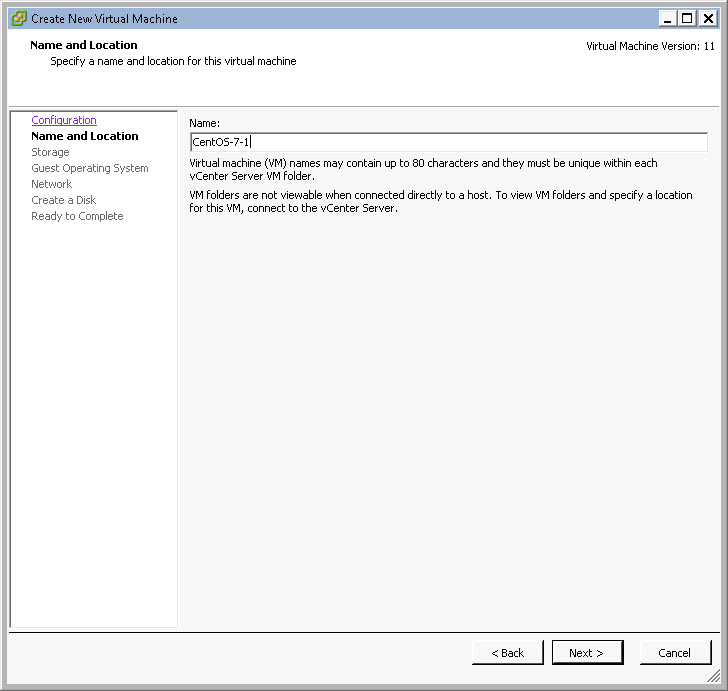
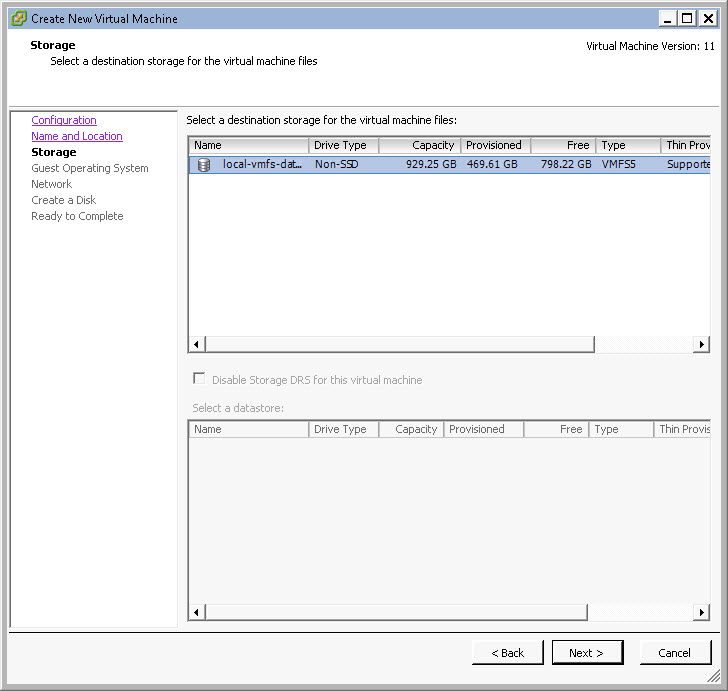
Select STORAGE for your VM
Choose your GUEST OPERATING SYSTEM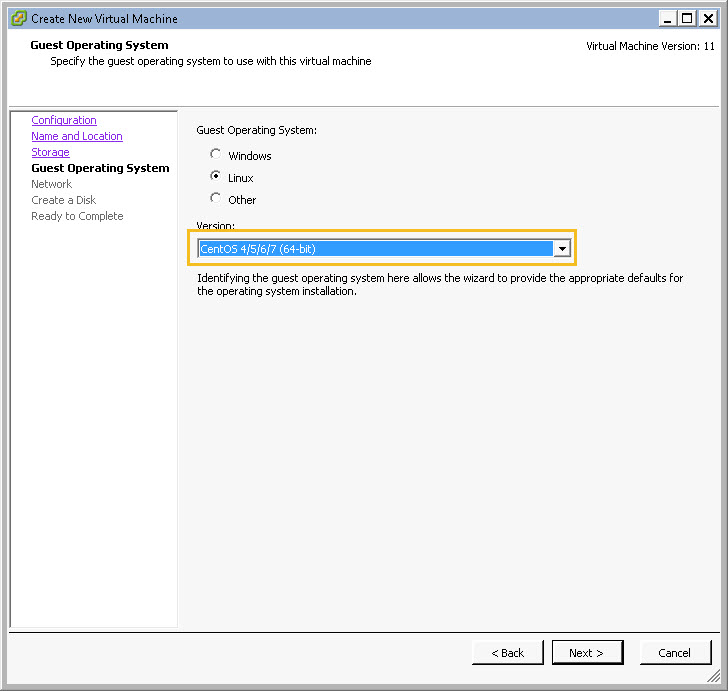
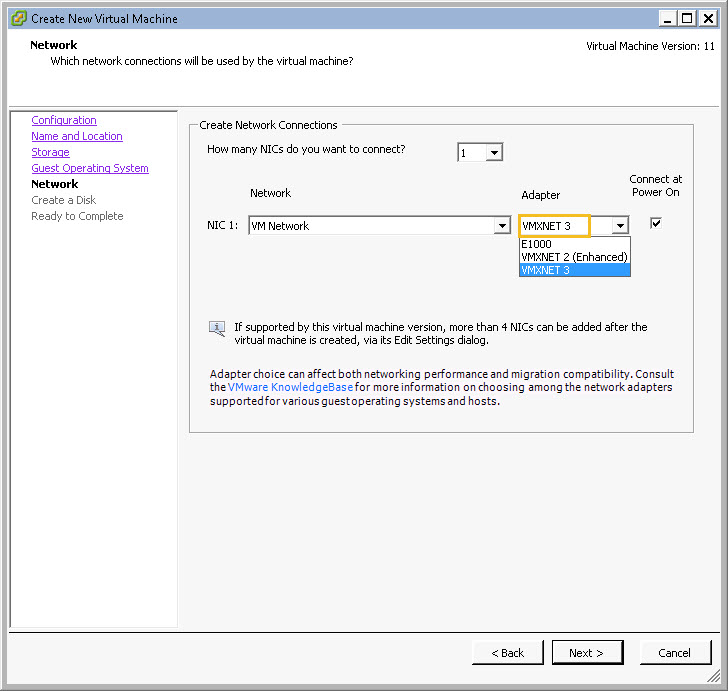
Choose your NETWORK adapter
Create you VM’s HARD DISK SIZE and choose THIN PROVISION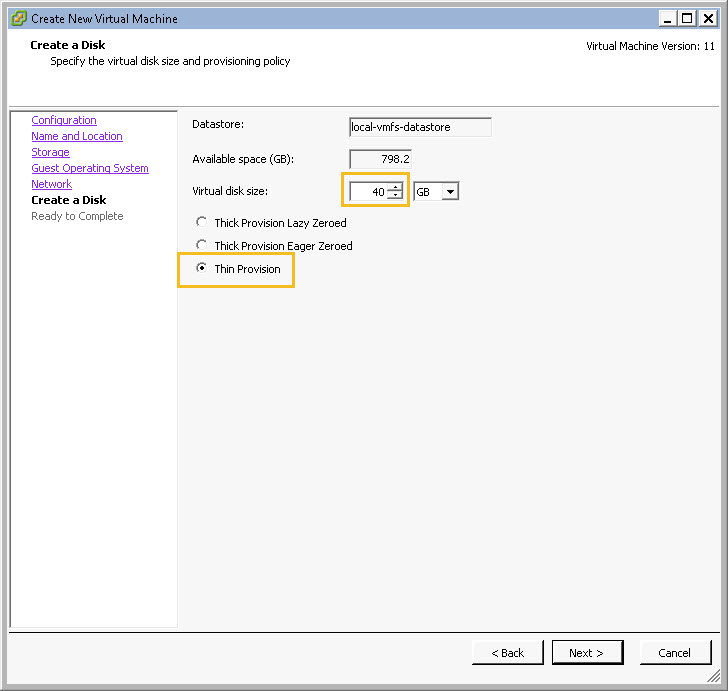
Check the EDIT VM SETTINGS box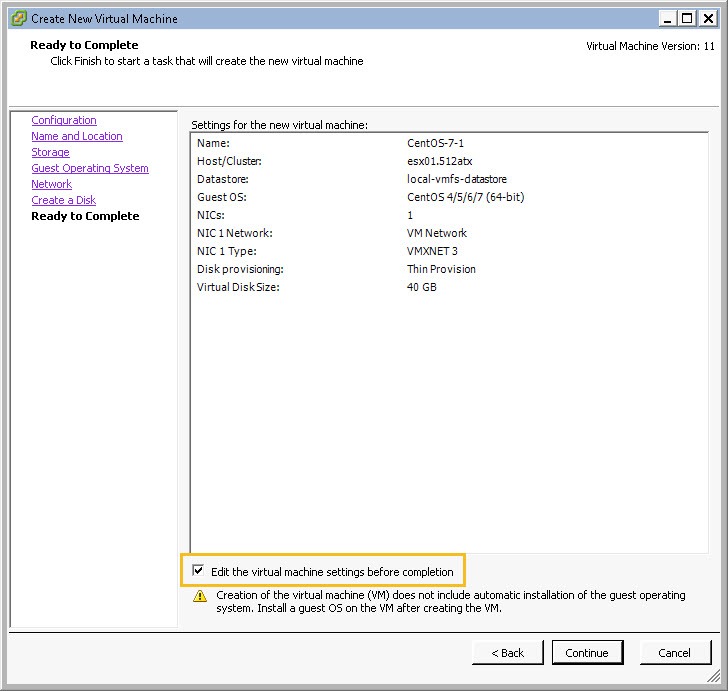
Change the RAM to what you see fit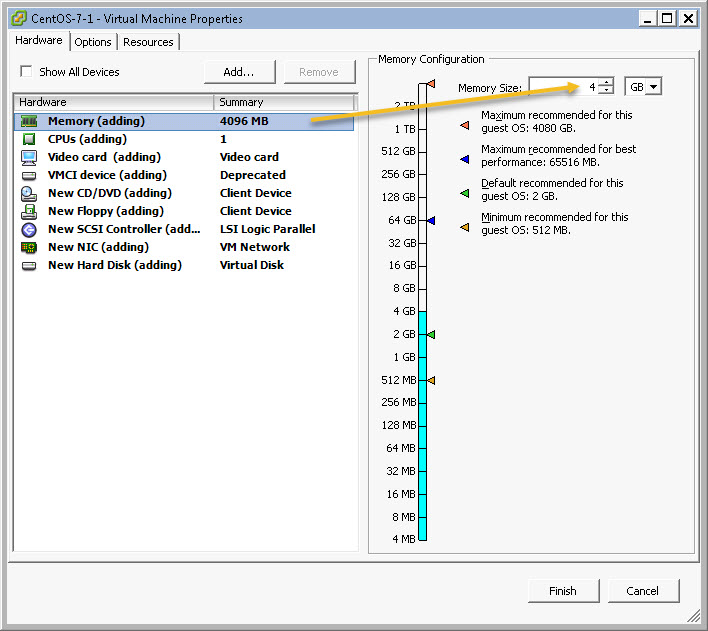
Change CPU settings to what you see fit (you don’t want to change this after installing the OS)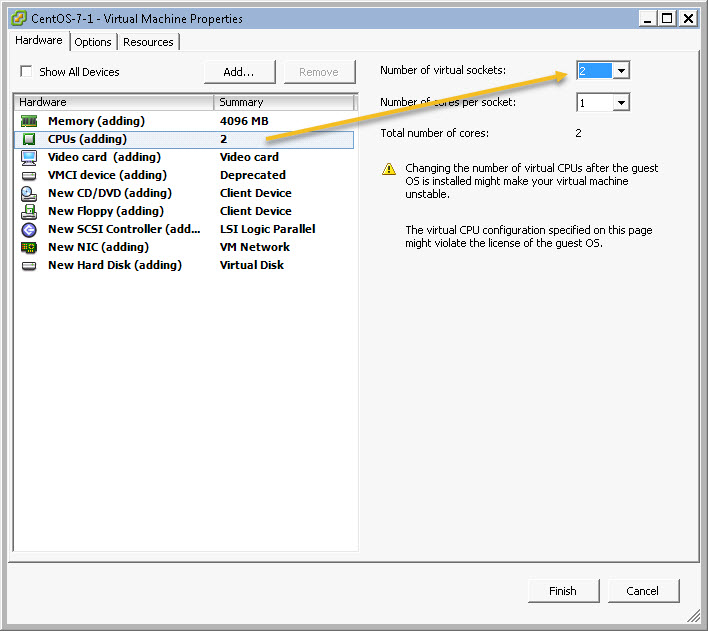
Change the VIDEO settings to whatever you like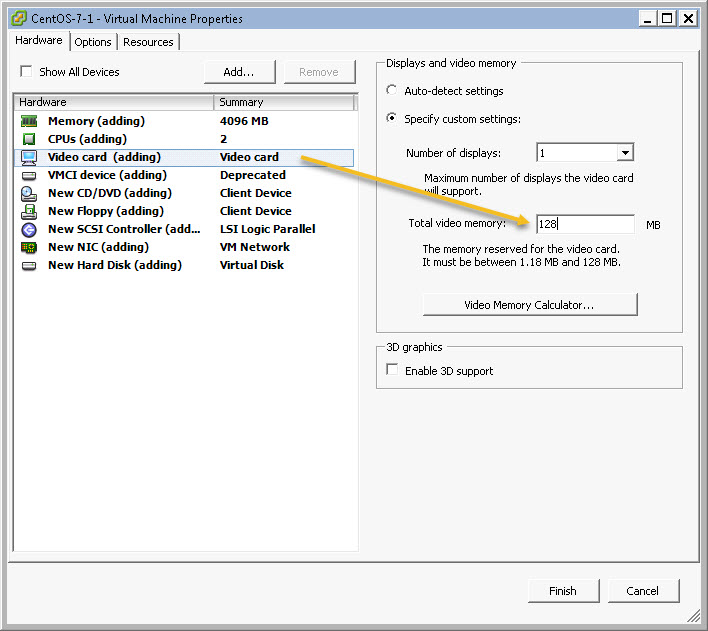
Check the box CONNECT AT POWER ON, select DATASTORE ISO FILE, and then browse to the .ISO file you uploaded earlier, afterwards click FINISH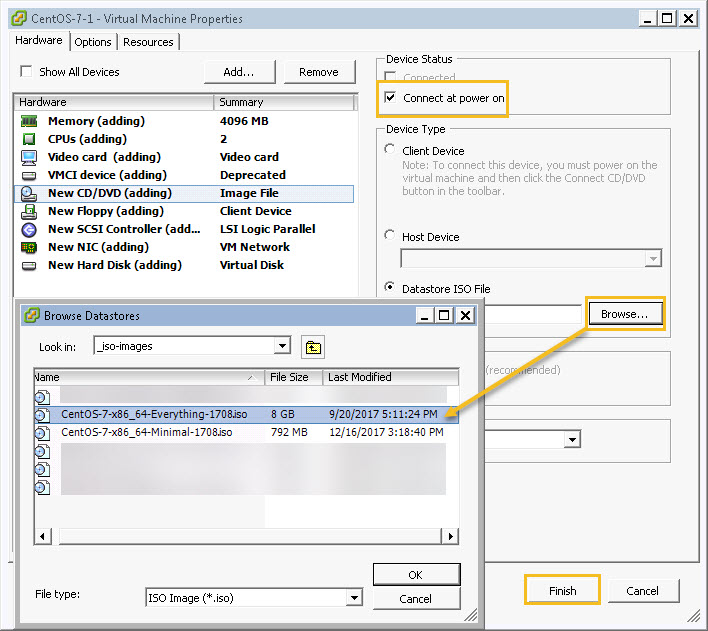
You will see the COMPLETED status at the bottom of the page. There are multiple ways to POWER ON the VM, and open the VM CONSOLE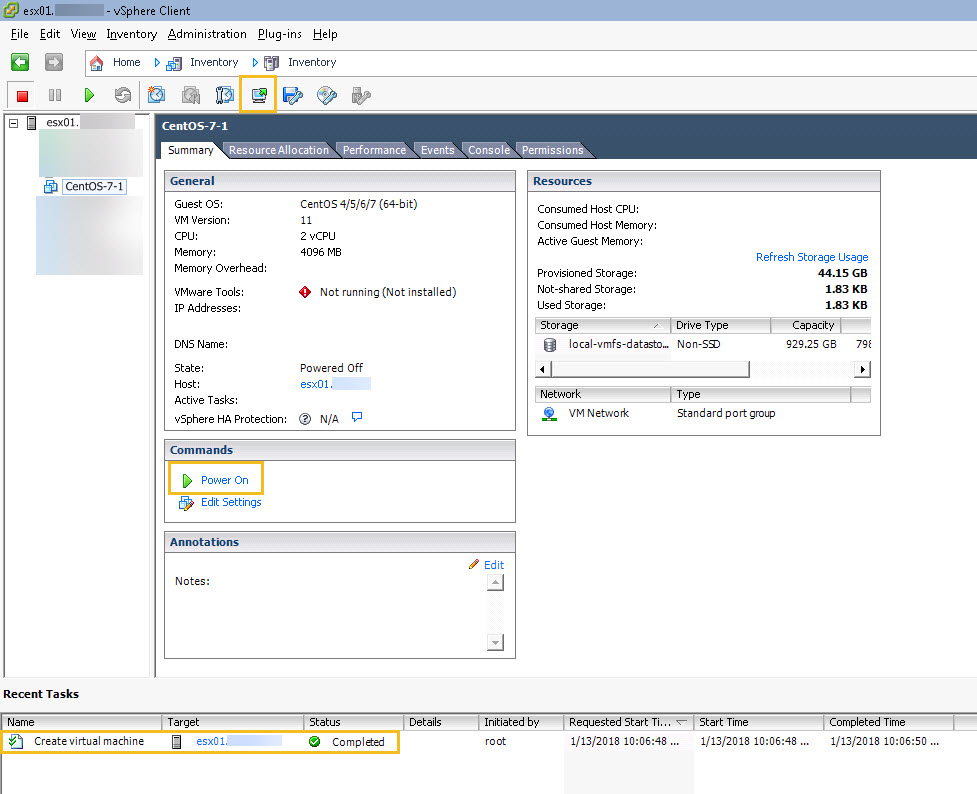
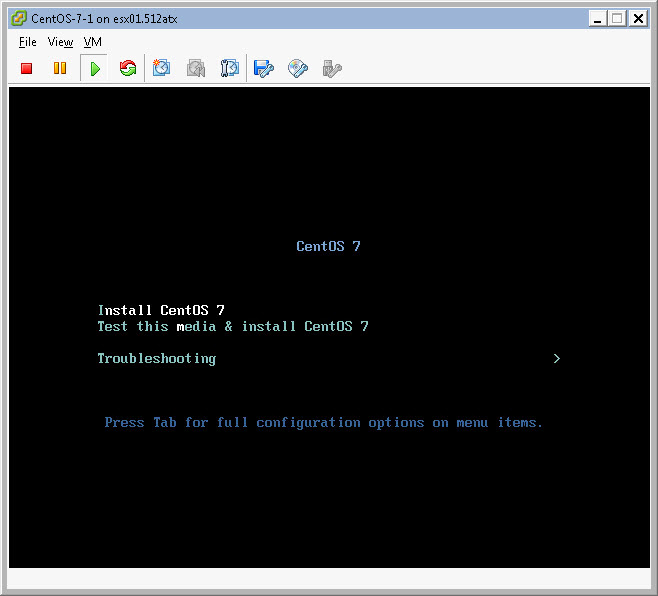
Now we will begin installing the OS, select INSTALL CentOS 7
Both options are correct for me, click CONTINUE
There are multiple options here we need to CONFIGURE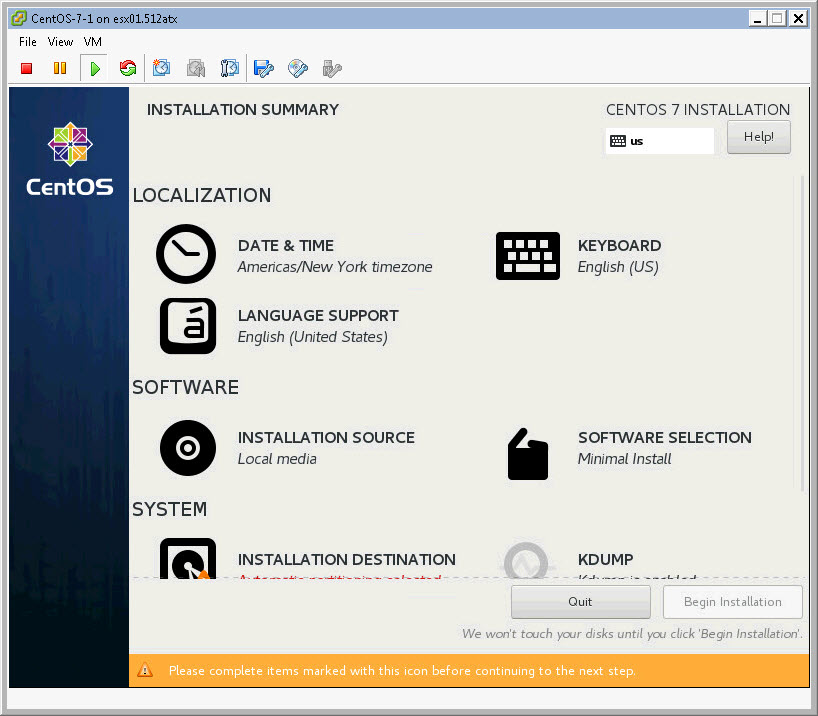
Select DATE & TIME and update as necessary 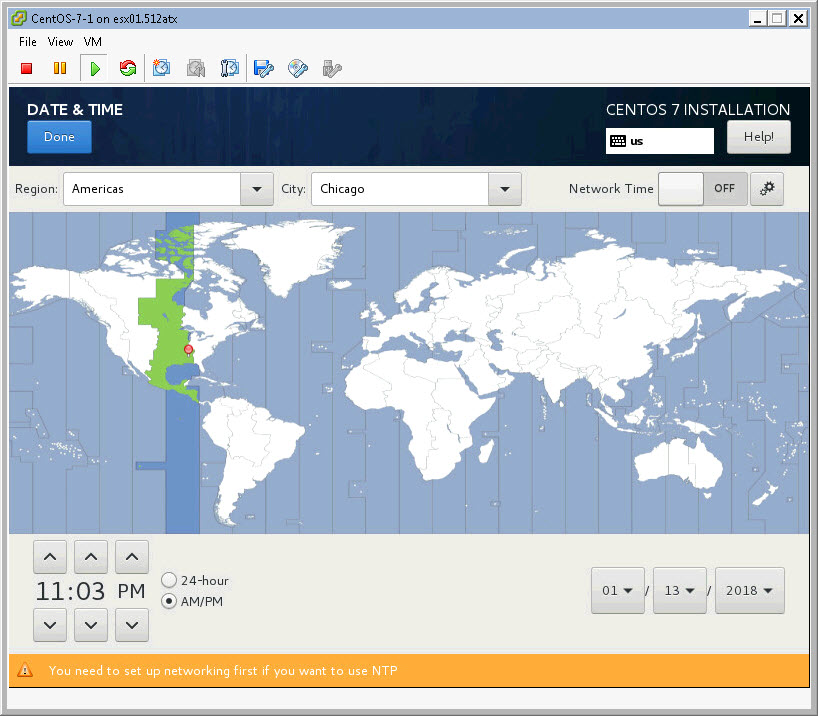
Select INSTALLATION DESTINATION, typically no changes needed here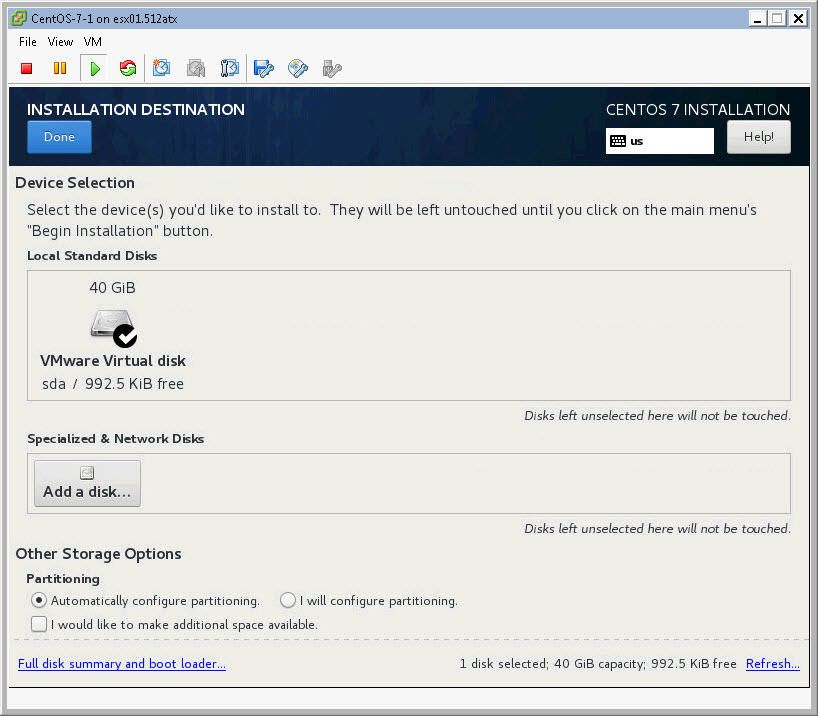
Click NETWORK and switch the button to ON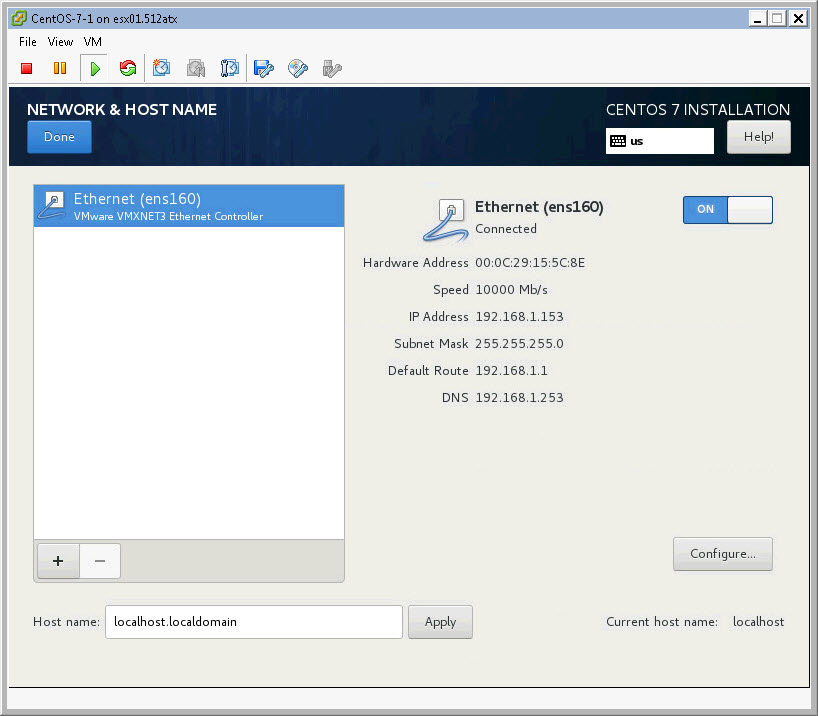
Select the SOFTWARE section, and choose DEVELOPMENT AND CREATIVE WORKSTATION
You will have a SUMMARY SCREEN reflecting all of your selections, click BEGIN INSTALLATION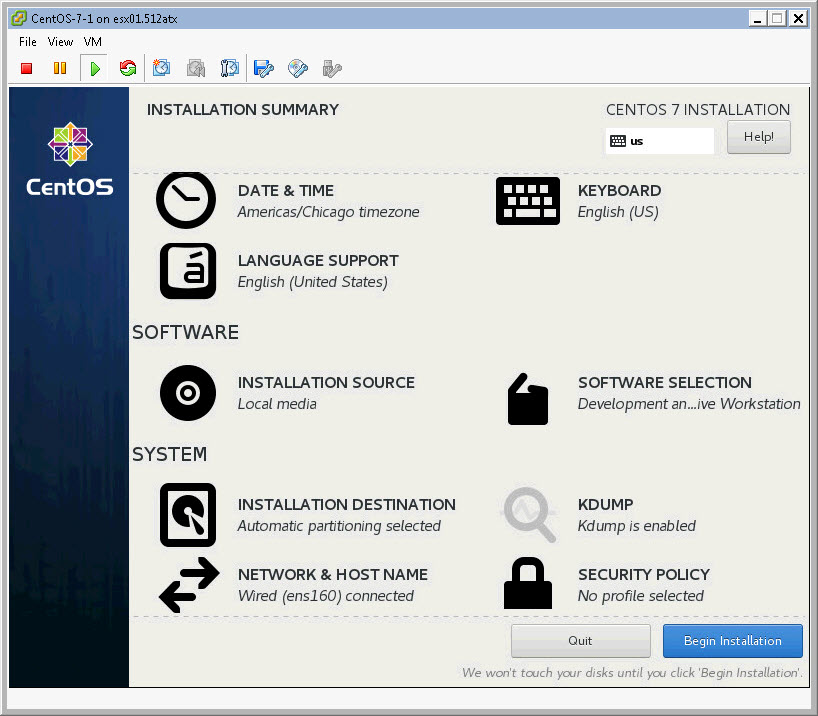
Configure a ROOT PASSWORD, also create a USER ACCOUNT and PASSWORD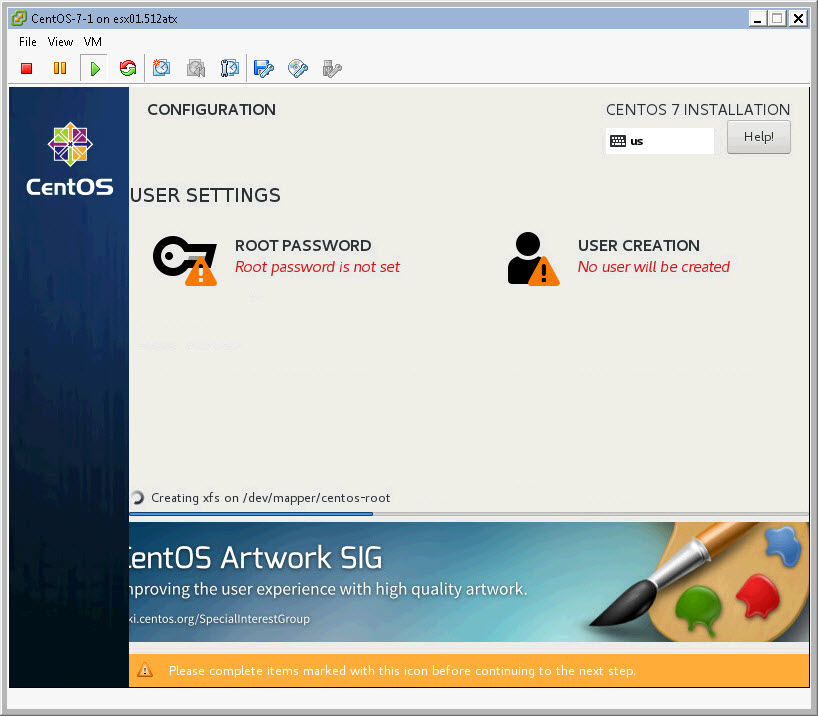
The INSTALLATION will take some time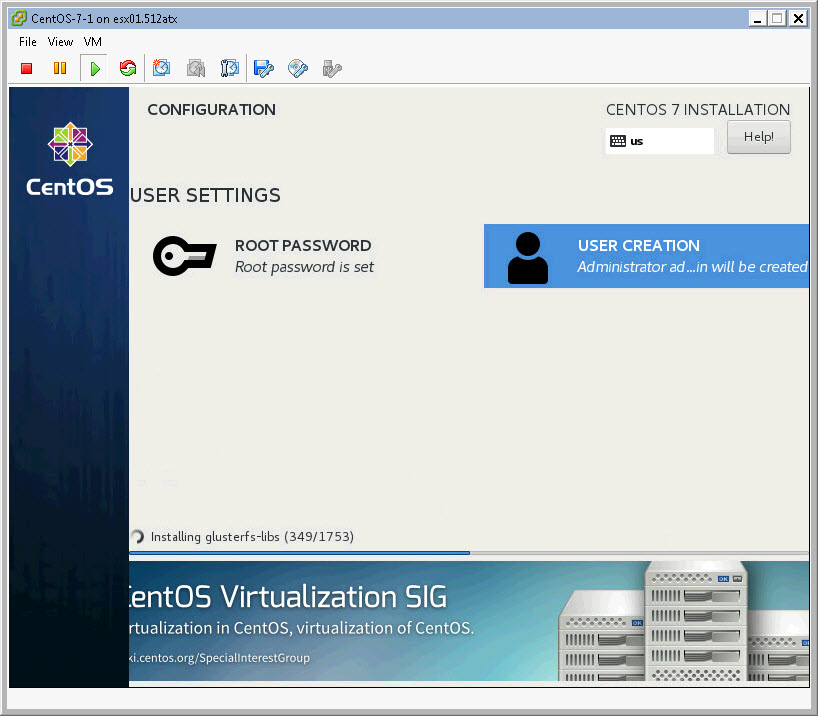
You will get a screen like below, click REBOOT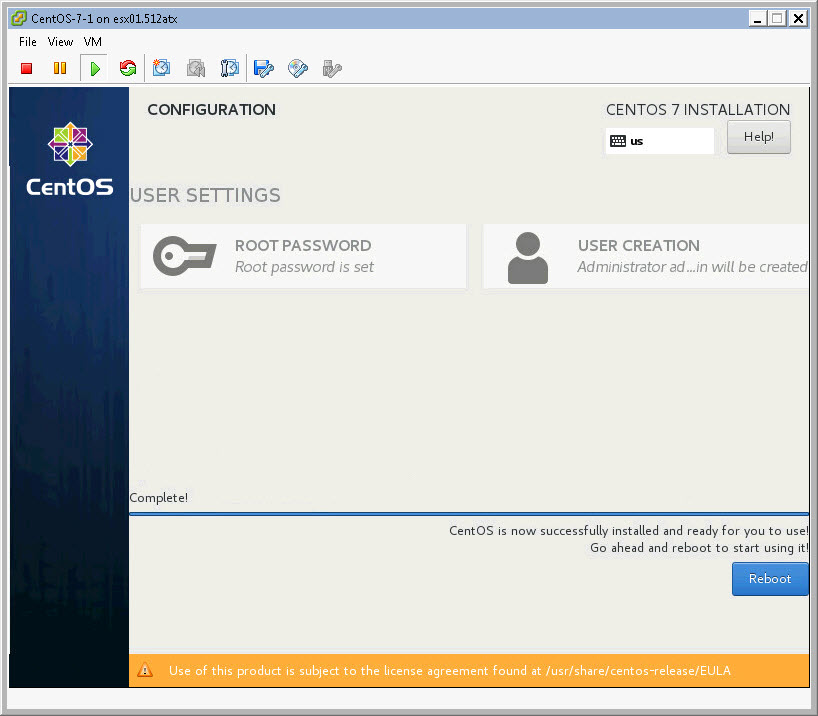
After the reboot, you will see the following screen. Click LICENSING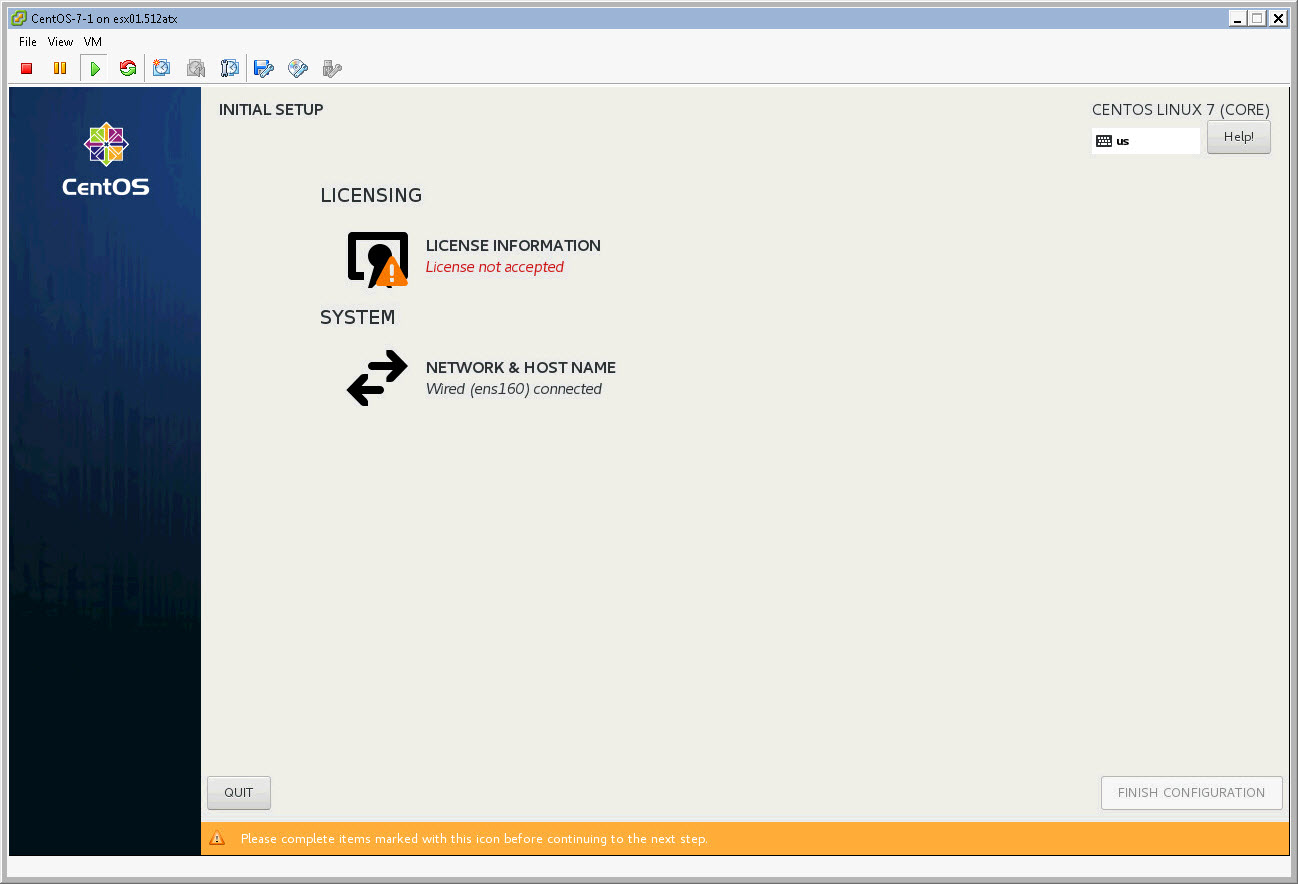
You will need to check the box next to I ACCEPT THE LICENSE AGREEMENT, and click DONE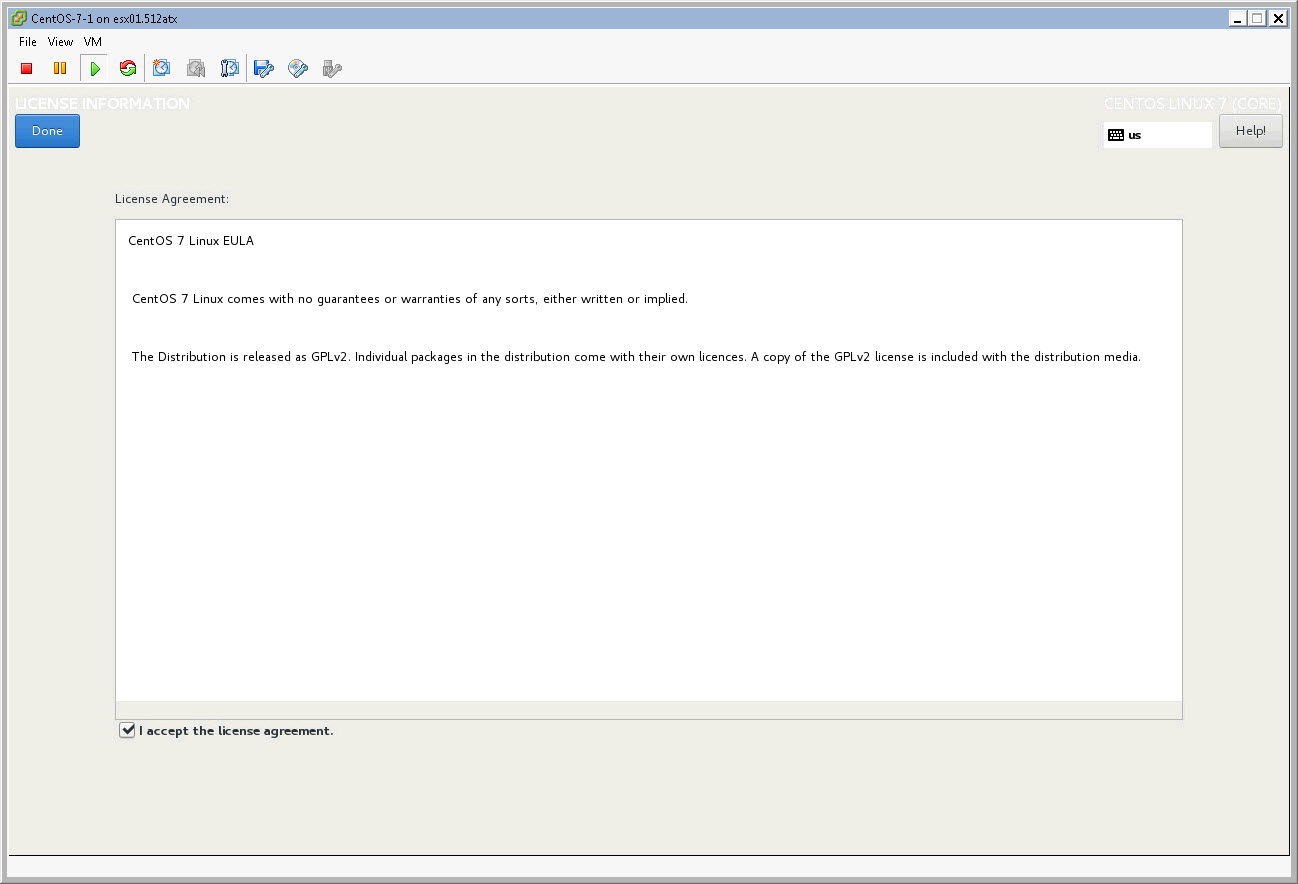
Finally you will get a FINISH CONFIGURATION button to complete the installation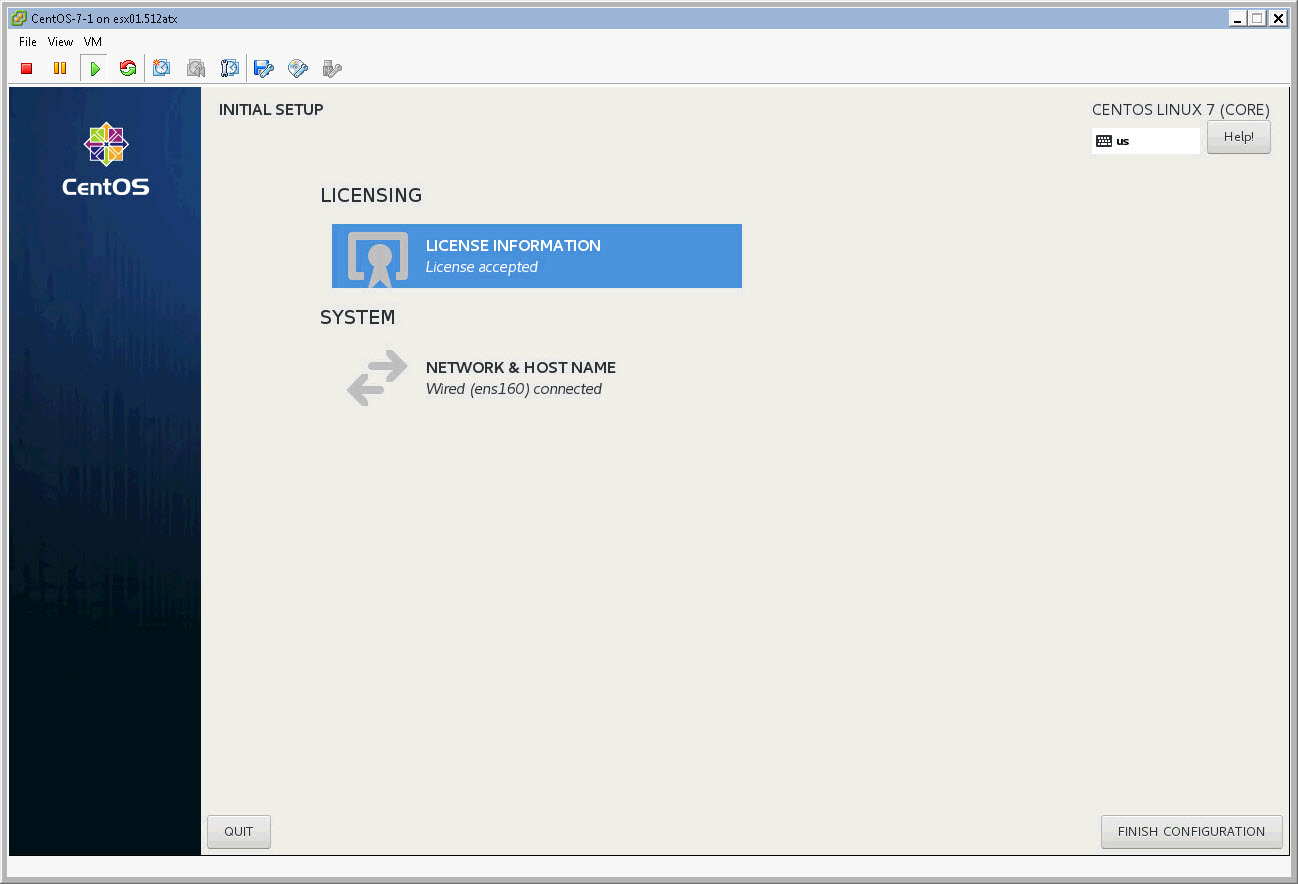
Here we see a login screen that shows we are finished with the installation!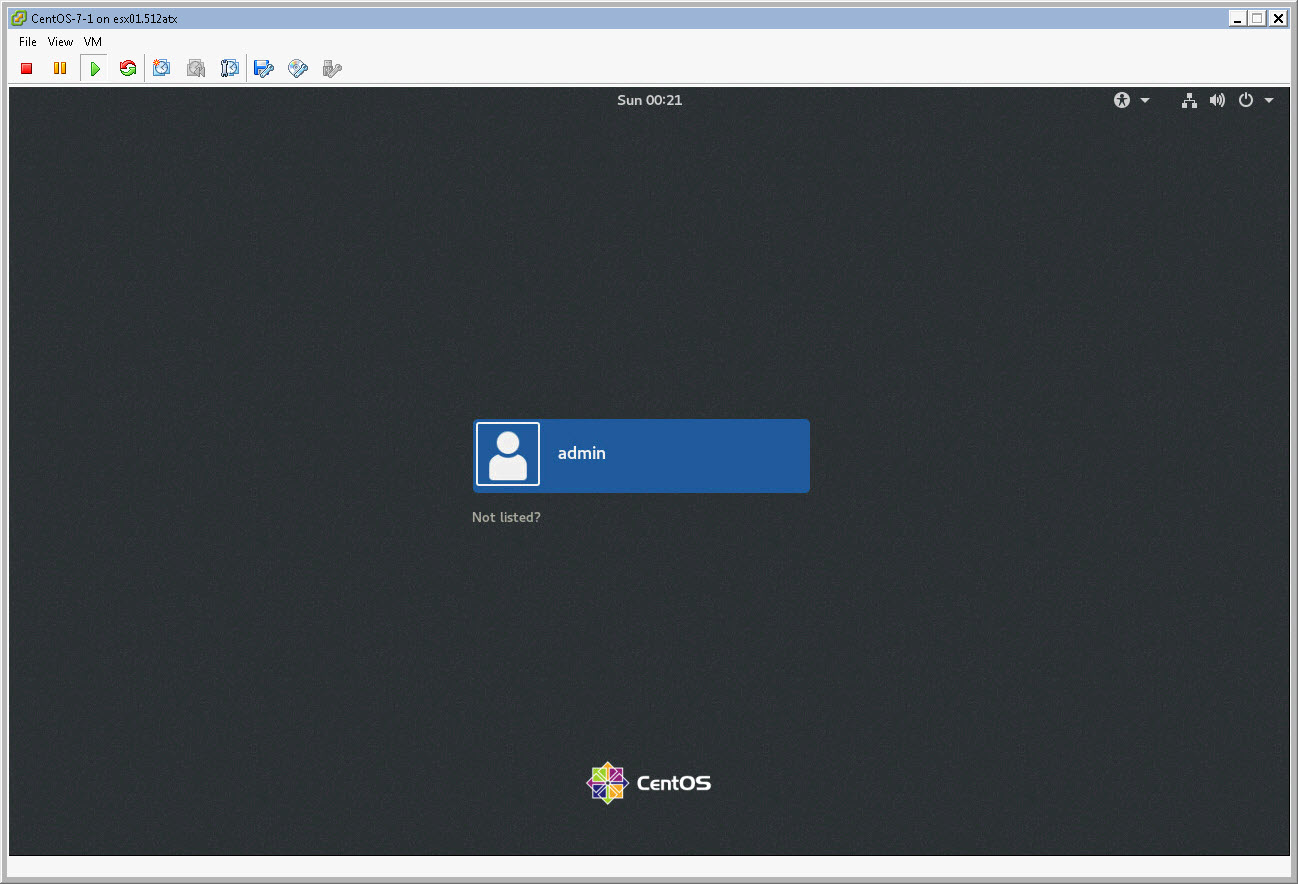
For our next tutorial we will show you how to install/enable RDP (Remote Desktop Protocol) so we can administer our newly installed VM through any Windows computer through the GUI in addition to SSH using WinSCP & PuTTY.